A sharp pocketknife is safer and more effective than a dull one—and learning to sharpen it properly is a skill every Scout should master. Whether you’re preparing for a Totin’ Chip requirement or just want your gear ready for camp, this guide will walk you through how to sharpen a pocketknife step-by-step.
Why Knife Sharpening Matters in Scouting
Sharpening a knife might seem like a minor task, but it’s a key part of being a responsible and prepared Scout. A sharp blade:
- Cuts more efficiently (less slipping = safer)
- Helps with camp chores like food prep, rope cutting, and fire prep
- Shows good gear maintenance and Scout readiness
Tools You’ll Need to Sharpen Your Pocketknife
Before you start, gather the following items:
- Sharpening stone (whetstone) – coarse and fine grit preferred
- Honing oil or water – depends on your stone type
- Soft cloth or towel – for cleaning your blade
- Gloves (optional) – for safety and grip
🔧 Tip: If you’re using a water stone, soak it in water for 5–10 minutes before use. Oil stones should be lightly coated with honing oil.
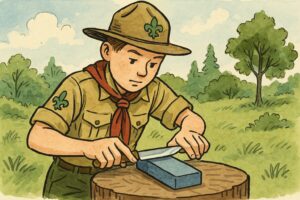
Step-by-Step: How to Sharpen a Pocketknife
Step 1: Clean the Blade
Wipe your pocketknife blade with a dry or slightly damp cloth to remove dirt, sap, or old oil.
Step 2: Lubricate the Sharpening Stone
Add a few drops of water (for water stones) or honing oil (for oil stones) to reduce friction and improve results.
Step 3: Set the Correct Angle (20° is Ideal)
Hold the knife at roughly a 20-degree angle against the stone. This angle works well for most general-use pocketknives.
🧭 Not sure what 20 degrees looks like? Stack two pennies under the spine of the blade as a simple guide.
Step 4: Sharpen One Side
Draw the blade across the stone from heel to tip in a smooth arc, applying light pressure. Repeat 8–10 times.
Step 5: Switch Sides
Flip the knife and repeat the motion for the other side of the blade, matching the same angle and number of strokes.
Step 6: Alternate Strokes
Do 3–5 alternating strokes per side to even out the edge.
Step 7: Use the Fine Side
If your stone has a fine side, repeat steps 4–6 on it to polish and refine the edge.
Step 8: Check for Burrs
Run your thumb perpendicular (not along!) the edge. A slight roughness or “burr” means the blade is sharpened. If burrs are gone, you’re done.
Step 9: Wipe Down the Blade
Use a cloth to clean off any metal dust or oil residue.
Safety Tips for Scouts
- Always sharpen away from your body
- Use a stable surface
- Keep fingers clear of the blade edge
- Never rush—take your time and stay focused
How Often Should You Sharpen a Scout Knife?
For light use (cutting rope, food, or wood shavings), once a month is usually enough. If the knife is used heavily during a campout or starts to feel dull, sharpen sooner.
🗓️ Keep a small sharpening stone in your pack for field touch-ups.
Final Thoughts
Knowing how to sharpen a pocketknife is a lifelong skill—and one that sets Scouts apart as capable and prepared. With just a little practice, you’ll keep your blade in top shape for everything from whittling to first aid.